| MODEL | DT-NH921 | DT-NH931 |
| IIT | Gen2+ | Gen3 |
| Magnification | 1X | 1X |
| Resolution | 45-57 | 51-57 |
| Photocathode type | S25 | GaAs |
| S/N(db) | 15-21 | 18-25 |
| Luminous sensitivity(μa-lm) | 450-500 | 500-600 |
| MTTF(hrs) | 10,000 | 10,000 |
| FOV(deg) | 42+/-3 | 42+/-3 |
| Detection distance(m) | 180-220 | 250-300 |
| Adjustable range of eye distance | 65+/-5 | 65+/-5 |
| Diopter(deg) | +5/-5 | +5/-5 |
| Lens system | F1.2, 25mm | F1.2, 25mm |
| Coating | Multilayer broadband coating | Multilayer broadband coating |
| Range of focus | 0.25--∞ | 0.25--∞ |
| Auto anti strong light | High Sensitivity, Ultra Fast, Broadband Detection | High Sensitivity, Ultra Fast, Broadband Detection |
| rollover detection | Solid non-contact automatic detection | Solid non-contact automatic detection |
| Dimensions (mm) (without eye mask) | 130x130x69 | 130x130x69 |
| material | Aviation aluminum | Aviation aluminum |
| Weight (g) | 393 | 393 |
| Power supply (volt) | 2.6-4.2V | 2.6-4.2V |
| Battery type (V) | AA(2) | AA(2) |
| Wavelength of infrared auxiliary light source (nm) | 850 | 850 |
| Wavelength of red-explode lamp source (nm) | 808 | 808 |
| Video capture power supply (optional) | External power supply 5V 1W | External power supply 5V 1W |
| Video resolution (optional) | Video 1Vp-p SVGA | Video 1Vp-p SVGA |
| Battery life (hours) | 80(W/O IR) 40(W/IR) | 80(W/O IR) 40(W/IR) |
| Operating Temperature (C | -40/+50 | -40/+50 |
| Relative humidity | 5%-98% | 5%-98% |
| Environment rating | IP65(IP67 Optional) | IP65(IP67 Optional) |
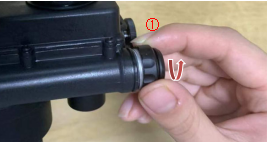
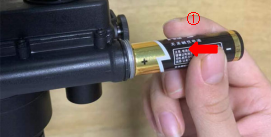
As shown in Figure ① Put two AAA batteries (polarity refer to the battery mark) into the night vision goggles battery barrel, and align the battery cover with the battery barrel thread, turn it tighten, to complete the battery installation


This product has four working switches, there are four modes in total, in addition to shutdown (OFF), there are also three working modes such as "ON", "IR", and "AT", which correspond to the normal working mode and the infrared mode , Auto mode, etc., as shown in Figure ..


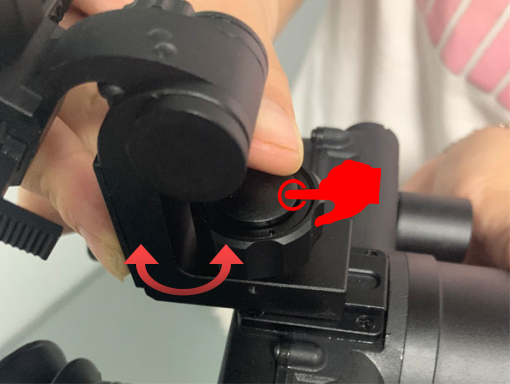
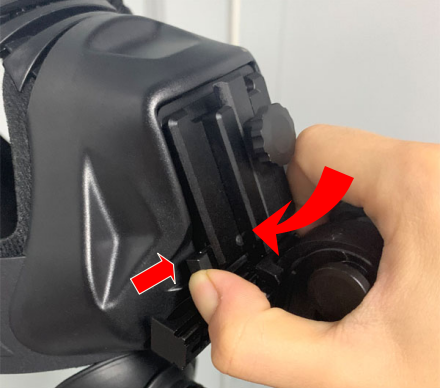
First, turn the knob on the helmet mount device to theend of the clock counter clockwise. Then use the universal fixture of the night vision instrument to one end ofthe eyepiece to the equipment slot of the helmet hanging device. Press the device button on the helmet mount vigorously. At the same time, the night vision instrument is pushed along the equipment slot. Until the button of center is moved to the middle at the universal fixture. At this time, release the anti button, turn the equipment locking knob clockwise and lock the equipment. As shown in Fig. 5.After installing the night vision instrument, Fasten the pendant of helmet mount to the general equipment slot of the soft helmet. Then press the lock button of the Helmet Pendant. At the same time, the components of the night vision instrument and Helmet Pendant are rotated counterclockwise. When the helmet mount connector is completely attached to the universal equipment slot of the soft helmet, Loosen the lock button of the Helmet Pendant and lock the product components on the soft helmet. As shown in Fig. 6.